
Key takeaways
- To size a recirculating chiller, calculate the heat load you need to remove, add a safety margin, and then check the chiller’s capacity at your actual setpoint, not its headline rating.
- Cooling capacity falls as setpoint drops; one manufacturer’s smallest model is rated at 550 W at 15 °C, 440 W at 10 °C, and 250 W at 0 °C.
- For rotary evaporators, the Delta 20 rule sets the coolant about 20 °C below the vapor temperature, and the heat load is mainly the latent heat of the solvent you evaporate.
- For reactors, add sensible heat for heating or cooling the contents, reaction heat, and losses; for instruments, use the manufacturer’s heat load and flow specifications.
- Pump flow and pressure, tubing length and insulation, room temperature, and heat rejection all affect whether a chiller performs as expected.
Look closely at a chiller specification sheet and the cooling capacity always comes with a temperature attached. Büchi’s recirculating chiller range shows why: its smallest model is rated at 550 W of cooling at 15 °C, 440 W at 10 °C, and only 250 W at 0 °C. Buy on the headline number, set the coolant colder than the rating assumes, and the chiller may never reach its setpoint.
Sizing a recirculating chiller comes down to three steps: work out the heat your process needs to remove, add a margin for real-world losses, and confirm the chiller can remove that heat at the coolant temperature you’ll actually use. This article walks through the calculation for rotary evaporators, reactors, and instruments, and covers the practical factors that decide whether a correctly sized chiller performs as expected. For the wider picture, see our guide to lab water baths and chillers.
How much cooling capacity do you need?
- Define the setpoint. Decide the coolant temperature your process needs, such as a condenser temperature for a rotary evaporator.
- Estimate the heat load. Add up latent heat from condensing vapor, sensible heat from cooling or heating materials, reaction heat, and equipment heat.
- Add margin. One chiller supplier recommends 20% to 30% on top of the estimated load for heat gained through tubing, imperfect insulation, and fluctuations.
- Check capacity at the setpoint. Compare your load with the chiller’s capacity at your setpoint, using the manufacturer’s capacity curve or table.
- Check flow and pressure. Make sure the pump can deliver the flow your equipment needs through your tubing.
As one rotary evaporation guide puts it, a chiller rated at 700 W with 20 °C coolant can’t be assumed to deliver 700 W at −10 °C; the capacity at your intended setpoint must be verified from published model data or confirmed with the manufacturer.


How do you size a chiller for a rotary evaporator?
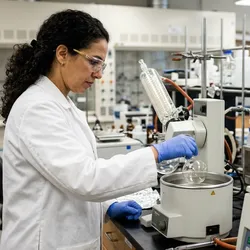
Start with the coolant temperature. The widely used Delta 20 rule, also called the 20/40/60 rule, sets the coolant about 20 °C below the vapor temperature and the bath about 20 °C above it. Büchi’s explanation gives the example of a 50 °C bath producing 30 °C solvent vapor, condensed with 10 °C coolant, and notes that colder settings, such as 0 °C coolant with 20 °C vapor and a 40 °C bath, suit low-boiling or heat-sensitive work.
Then estimate the heat load. Most of it is the latent heat released when solvent vapor condenses. As a worked example, evaporating 1 liter of ethanol per hour (about 789 g, with a latent heat of roughly 0.9 kJ/g near typical evaporation temperatures) releases about 710 kJ per hour, or roughly 200 W. With a 25% margin, that’s about 250 W at the condenser coolant temperature. Higher evaporation rates scale proportionally: one supplier estimates around 700 W, including margin, for a 10 L rotary evaporator evaporating about 3 L of ethanol per hour.
| Factor | Effect on Chiller Size |
|---|---|
Evaporation rate | More solvent per hour means more latent heat to remove |
Solvent | Water has a much higher latent heat per gram than most organic solvents |
Coolant temperature | Colder setpoints reduce available chiller capacity |
Condenser type and area | More condenser area lets warmer coolant do the same job |
Bath temperature and vacuum | Set the evaporation rate and vapor temperature |
One caution from a chiller buying guide: setting the chiller too cold can leave it with less capacity than the bath delivers as heat, so the coolant never reaches setpoint and vapor passes the condenser uncondensed. Ecodyst’s Rule of 20 explainer adds that colder coolant improves evaporation, but at a cost in energy.
How do you size a chiller for a jacketed reactor?
Reactors combine several heat loads:
- Sensible heat to bring the contents and vessel to temperature. Cooling 10 kg of water by 40 °C in 30 minutes, for example, requires removing about 1,670 kJ, or roughly 930 W on average, before losses.
- Reaction heat from exothermic reactions, which can dominate and must be estimated from reaction calorimetry or literature data.
- Agitator and equipment heat added by mixing and other components.
- Losses and gains through the vessel, tubing, and connections.
Size for the worst case, usually the peak exotherm or the fastest required temperature change, not the average. For reactions that need temperatures well below 0 °C, a heating and cooling circulator with a suitable fluid is usually needed rather than a basic chiller.
What about instruments?
Many instruments, including lasers, ICP spectrometers, electron microscopes, and some mass spectrometers, specify their own cooling requirements: heat load, coolant temperature, flow rate, pressure, and sometimes water quality. Use those specifications directly, add margin, and confirm the chiller meets flow and pressure at the instrument’s inlet, not just at the chiller outlet. Ask the instrument manufacturer for approved chiller models where warranties depend on it.
Interested in lab tools and techniques?

Pump flow, pressure, and plumbing
- Flow rate. Equipment needs enough flow to carry heat away; check the requirement at the equipment, not the chiller.
- Pump pressure. Long, narrow, or elevated tubing runs and condensers add resistance. Compact chillers may have modest pump pressure; the buying guide gives an example of a compact model with a 2.9 psi maximum.
- Tubing. Use the recommended diameter, keep runs short, and insulate tubing at low setpoints to reduce heat gain and condensation.
- Fluid. Below about 5 °C, water–glycol mixtures prevent freezing; fluid choice and safety are covered in Bath Fluids and Heating Safety: Water, Glycol, and Silicone Oil Compared.
Where the heat goes
A chiller doesn’t destroy heat; it moves it. Air-cooled chillers release the heat they remove, plus their own compressor heat, into the room. Several chillers in one lab can noticeably raise room temperature and HVAC load, and capacity drops when room temperature rises above the rating conditions. Water-cooled chillers reject heat to facility cooling water instead. Leave clearance around air vents, and check room cooling capacity before adding units.
Chillers often replace single-pass tap water cooling, with significant water savings; see Replacing Single-Pass Cooling Water With Chillers: The Sustainability and Cost Case.
A chiller sizing checklist
- The coolant setpoint is defined first. For rotary evaporators, use the Delta 20 rule as a starting point; for reactors and instruments, use process or manufacturer requirements. Everything else depends on this number.
- Heat load is calculated, not guessed. Add latent, sensible, reaction, and equipment heat. If calculations aren’t practical, measure coolant inlet and outlet temperatures and flow on an existing setup.
- A margin of 20% to 30% is included. Margin covers tubing gains, insulation gaps, and ambient changes. More margin is sensible for exothermic reactions.
- Capacity is checked at the setpoint. Use the manufacturer’s capacity curve or table. Headline ratings at warmer temperatures overstate what you’ll get at colder setpoints.
- Pump flow and pressure suit the plumbing. Check requirements at the equipment, accounting for tubing length, diameter, and height. Larger or external pumps may be needed for long runs.
- The fluid suits the temperature range. Use water–glycol below about 5 °C and confirm compatibility with tubing and equipment.
- Heat rejection is planned. Air-cooled chillers warm the room; check HVAC capacity, or use water-cooled units where facility water is available.
- Shared chillers are sized for combined loads. If one chiller serves several devices, add their loads and check that flow is balanced between them.
The number on the front of a chiller brochure is only the start of sizing. Calculate your heat load, add margin, check capacity at the temperature you’ll actually run, and make sure the pump and the room can keep up.
This article was produced under Lab Manager’s AI Editorial Guidelines