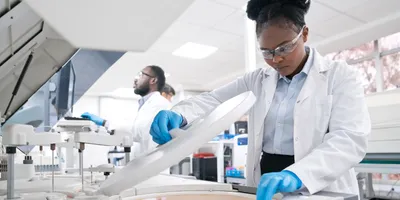
a Laboratory Autoclave used for the sterilization of lab equipment

Autoclaving Guidelines for Sterilization of Lab Equipment

Operating an autoclave requires caution and adherence to strict regulatory requirements. Follow these autoclaving guidelines for sterilizing equipment and research materials.

Written byTrevor Henderson, PhD
Updated | 3 min read
Register for free to listen to this article
Listen with Speechify
0:00
3:00

Proper sterilization is the cornerstone of any laboratory’s operations, ensuring both the accuracy of research results and the safety of personnel. Among various sterilization techniques, autoclaving stands out as a reliable method that employs steam and pressure to effectively eliminate contaminants from lab equipment and materials. However, the efficacy of autoclaving hinges on strict adherence to safety protocols and operational guidelines. This comprehensive guide walks you through the critical steps for autoclaving lab equipment, highlights common pitfalls to avoid, and provides actionable best practices for ensuring reliable and consistent sterilization.


Step-by-Step Autoclaving Guidelines
  1. Sort and Prepare Materials

    1. Group items based on their compatibility with autoclaving. For example, separate plastics, glassware, and metal tools to prevent damage.

    2. Ensure that all materials are autoclave-safe. Check for heat and pressure tolerance markings on containers and packaging.

    3. Loosen caps on bottles to prevent pressure buildup that could cause breakage or explosions.

  2. Prepare Research Materials for Sterilization

    1. Glassware:

      1. Cap Pyrex bottles loosely, whether empty or filled, to prevent explosions due to expansion.

      2. Cover bottles that are not made of safety glass (e.g., not Pyrex) with aluminum foil.

    2. Liquids:

      1. Fill containers only half full to allow room for expansion.

    3. Combination Loads:

      1. Do not combine strong oxidizing materials (e.g., dry hypochlorites) with organic materials (e.g., paper, cloth, or oil).

  3. Use Secondary Containment

    1. Use polypropylene or stainless steel tubs for secondary containment of all items being autoclaved.

    2. Verify that plastic containers are autoclave-safe by checking the imprinted initials on the bottom:

      1. Use: Polypropylene (PP, recycle #5) or Polycarbonate (PC, no recycle number assigned).

      2. Do Not Use: Polyethylene (PE, recycle #1) or High-Density Polyethylene (HDPE, recycle #2).

    3. If unsure about a new container, test it in an autoclave-safe container the first time.

    4. Select a container with the lowest sides and widest diameter possible to improve steam circulation.

  4. Check the Autoclave’s Drain Screen

    1. For efficient heat transfer, steam must flush the air out of the autoclave chamber. If the drain screen is blocked with debris, a layer of air may form at the bottom of the autoclave and prevent proper operation.

    2. Inspect the drain screen at the bottom of the chamber before every use. Remove any debris to ensure optimal performance.

  5. Close the Autoclave Door Securely

    1. Ensure the autoclave door is sealed before selecting the cycle to avoid steam leaks.

  6. Choose the Correct Cycle

    1. For liquids, always select the liquid or "slow exhaust" cycle to prevent boiling over.

    2. Consult your lab manager for recommended cycles for sterilizing dry goods or equipment.

    3. For more information, refer to detailed descriptions of cycle types in the Autoclave Overview.

  7. Set the Appropriate Time for Sterilization and Drying

    1. Follow these recommended times:

      1. Nonhazardous Dry Goods: Sterilize for 30 minutes and dry for 20 minutes. Enclosed items like pipette tips or bottles with lids may require additional drying time.

      2. Liquids: Add 10-20 minutes for crowded loads.

        1. Less than 500 milliliters (ml): 30 minutes

        2. 500 ml – 1 liter: 40 minutes

        3. 2-4 liters: 55 minutes

        4. More than 4 liters: 60 minutes

      3. New Glassware: Autoclaving for 90 minutes partially tempers the glass, increasing its strength.

    2. Allow liquids to stand for at least 10 minutes after the cycle is complete before opening the door.

  8. Start the Autoclave

    1. Push the "start" button on the control panel to initiate the cycle.

  9. Fill Out the Autoclave Log

    1. Record the date, cycle parameters, and any observations in the autoclave log while the machine is "charging" or starting.


Best Practices for Autoclaving

  1. Routine Maintenance: Regularly clean and inspect all components of the autoclave, including the chamber, door seals, and pressure valves, to ensure optimal performance and safety. Check for debris buildup in the drain screen and verify that all sensors are functioning correctly. Schedule professional servicing at least annually to maintain compliance with manufacturer guidelines and regulatory standards.

  2. Training and Documentation: Provide comprehensive training to all lab personnel on the proper use of autoclaves, including loading procedures, cycle selection, and emergency shutdown protocols. Maintain detailed records of every sterilization cycle, including the date, operator, and materials processed, to ensure traceability and compliance with institutional and regulatory requirements.

  3. Avoid Hazardous Materials: Never autoclave items containing flammable, volatile, or corrosive substances, such as alcohol, bleach, or strong acids. These materials can create dangerous reactions, release harmful fumes, or damage the autoclave. Always consult the material safety data sheet (MSDS) for guidance on the safe disposal of hazardous substances.

  4. Waste Management: Follow institutional and regulatory guidelines for autoclaving biohazard waste. Use only certified biohazard bags that are labeled as autoclave-safe. Ensure waste bags are securely closed and do not exceed recommended fill levels. After sterilization, dispose of the treated waste in accordance with local environmental and safety regulations.


Final Thoughts: Ensuring Effective Sterilization

Autoclaving is a powerful and reliable method for sterilizing laboratory equipment when done correctly. By following these guidelines and adhering to safety protocols, laboratories can maintain a clean and compliant environment, ensuring the integrity of their research and the safety of their personnel.

Lab manager academy logo

Lab Safety Management Certificate

The Lab Safety Management certificate is more than training—it’s a professional advantage.

Gain critical skills and IACET-approved CEUs that make a measurable difference.


This content includes text that has been generated with the assistance of AI. Lab Manager’s AI policy can be found here.

About the Author

  • Trevor Henderson headshot

    Trevor Henderson BSc (HK), MSc, PhD (c), has more than two decades of experience in the fields of scientific and technical writing, editing, and creative content creation. With academic training in the areas of human biology, physical anthropology, and community health, he has a broad skill set of both laboratory and analytical skills. Since 2013, he has been working with LabX Media Group developing content solutions that engage and inform scientists and laboratorians. He can be reached at thenderson@labmanager.com.

    View Full Profile

Related Topics

Loading Next Article...

CURRENT ISSUE - May/June 2025

The Benefits, Business Case, And Planning Strategies Behind Lab Digitalization

Joining Processes And Software For a Streamlined, Quality-First Laboratory

Lab Manager May/June 2025 Cover Image