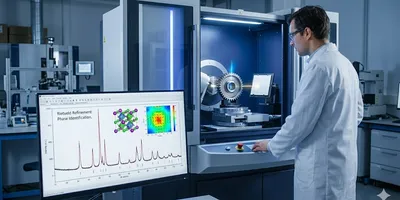
X-ray diffraction (XRD) serves as a fundamental analytical technique for verifying the structural integrity of alloy and ceramic materials in industrial and research settings. Materials scientists rely on this non-destructive method to identify crystalline phases and monitor microstructural changes that influence material performance. Modern diffractometers provide precise data regarding lattice parameters, crystallite size, and residual stress. This capability effectively bridges the gap between processing conditions and final material properties. Advanced characterization strategies now permit the detailed analysis of complex multi-phase systems found in aerospace alloys and engineered ceramics. The ability to correlate diffraction patterns with physical properties makes this technology indispensable for failure analysis and quality assurance protocols.
XRD phase identification strategies for industrial alloys
Accurate phase identification ensures mechanical reliability by verifying the presence of specific microstructural constituents within processed metals.
The primary function of XRD in metallurgy involves the qualitative and quantitative analysis of crystalline phases. Alloys often consist of multiple phases that dictate key material properties:
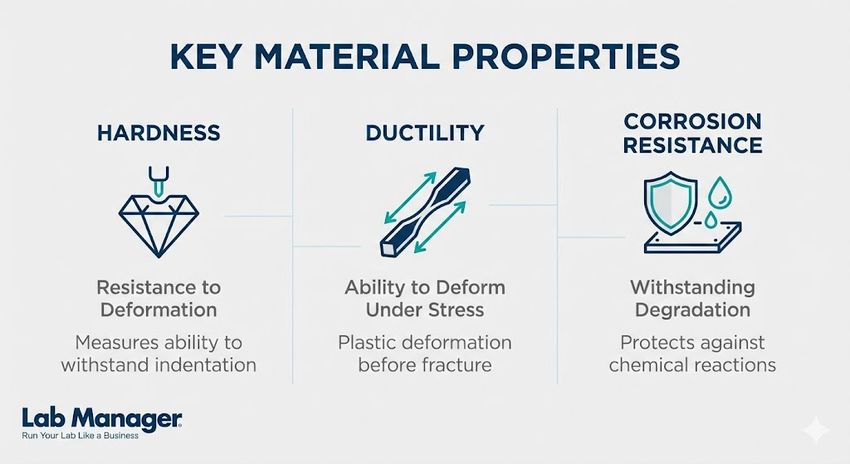
Alloys often consist of multiple phases that dictate key material properties.
GEMINI (2026)
- Hardness
- Ductility
- Corrosion resistance
For instance, in the production of stainless steel, the ratio of austenite to ferrite significantly impacts the material's magnetic properties and formability. Diffraction analysis detects these phases by measuring the scattering of X-rays from crystal planes. This process follows Bragg’s Law. Each phase produces a unique diffraction pattern, acting as a fingerprint that analysts compare against reference databases such as the International Centre for Diffraction Data (ICDD) Powder Diffraction File.
Identifying minor phases requires high signal-to-noise ratios and optimized scan parameters. Precipitates in nickel-based superalloys, such as gamma prime particles, exist in small volume fractions but control high-temperature strength. Diffraction techniques distinguish these ordered intermetallic phases from the disordered matrix through the detection of superlattice reflections. ASTM International provides specific standards, such as ASTM E975, which outlines standard practices for the X-ray determination of retained austenite in steel. Adhering to these standards ensures data reproducibility across different laboratories and instruments.
Beyond simple identification, tracking phase transformations stands as a critical application. Heat treatment processes induce structural changes that diffraction analysis monitors. For example, characterizing the decomposition of martensite during tempering helps metallurgists refine thermal processing cycles. The technique also proves effective in identifying deleterious phases, such as sigma phase in duplex stainless steels, which can cause embrittlement. Continuous scanning or high-speed detectors allow labs to maximize throughput. This approach maintains the resolution necessary to deconstruct complex overlapping peaks common in alloy systems.
XRD methods for residual stress in engineering ceramics
Structural ceramics require precise stress measurement to prevent catastrophic failure under load due to their inherent brittleness.
Engineering ceramics serve in demanding environments where thermal and mechanical loads induce significant stress. Common examples include:
- Alumina
- Silicon carbide
- Zirconia
Unlike metals, ceramics lack plasticity. Consequently, residual stresses generated during sintering or machining can lead to immediate fracture. XRD provides a non-destructive means to measure near-surface residual stress by detecting changes in lattice spacing. When a material is under tension or compression, the interplanar spacing ($d$-spacing) expands or contracts. This causes a shift in the diffraction peak position. Analysts typically employ the $\sin^2\psi$ method to calculate the stress tensor from these shifts.
Zirconia-based ceramics utilize a phase transformation mechanism for toughening, which diffraction analysis characterizes effectively. Tetragonal zirconia particles within a ceramic matrix transform into the monoclinic phase near a propagating crack. This transformation is accompanied by a volume expansion that closes the crack tip. XRD quantifies the fraction of monoclinic versus tetragonal phases on the surface, providing a direct metric of the transformation toughening efficiency. This analysis is vital for validating the performance of biomedical implants and thermal barrier coatings.
Microstrain analysis also offers insights into the defect density within the crystal lattice. Line broadening in a diffraction pattern results from several factors:
- Instrument effects
- Crystallite size
- Lattice strain
By applying the Williamson-Hall analysis or Warren-Averbach method, analysts separate size-induced broadening from strain-induced broadening. This distinction allows for the monitoring of lattice distortion caused by dopants or vacancies, which often determine the thermal and electrical conductivity of functional ceramics.
Comparison of XRD applications
Feature | Application in Alloys | Application in Ceramics |
|---|---|---|
Primary Goal | Phase quantification (e.g., Retained Austenite) | Stress analysis and polymorph identification |
Key Challenge | Texture (Preferred Orientation) | Low symmetry / Peak overlap |
Sample Prep | Electropolishing to remove deformed layers | Grinding to fine powder or polished solids |
Data Analysis | Rietveld refinement for multiphase alloys | Line profile analysis for crystallite size |
Rietveld refinement for quantitative analysis of alloys and ceramics
The Rietveld method allows for precise quantification of overlapping phases in complex multi-phase systems through whole-pattern fitting.
Traditional quantitative analysis often relies on single-peak intensity ratios, which can suffer from errors due to preferred orientation or peak overlap. Rietveld refinement overcomes these limitations by modeling the entire diffraction pattern based on:
- Crystallographic data
- Instrument geometry
- Background functions
A least-squares refinement algorithm minimizes the difference between the calculated and observed patterns. This approach proves particularly valuable for alloys and ceramics containing phases with similar crystal structures. In these cases, distinct peaks are difficult to isolate.
In the context of cementitious materials and hydration products, Rietveld refinement quantifies amorphous content through the use of an internal standard. Many advanced ceramics and geopolymers contain non-crystalline regions that do not diffract X-rays coherently. By adding a known weight fraction of a highly crystalline standard (such as corundum or silicon) to the sample, the software calculates the absolute abundance of crystalline phases. The discrepancy between the calculated crystalline total and 100% represents the amorphous fraction. This data aids in optimizing formulation chemistry for construction materials.
Accuracy in Rietveld refinement depends heavily on the quality of the starting structural models and instrument calibration. Researchers must select appropriate crystal structure files that match the chemistry of the sample. For solid solutions—common in both alloys and doped ceramics—refining site occupancy and lattice parameters becomes necessary. To minimize instrumental error, analysts rely on National Institute of Standards and Technology (NIST) Standard Reference Materials (SRMs). Common examples include the SRM 660 series (LaB₆) for line profile calibration and the SRM 640 series (Silicon) for line position. Using these standards ensures that calculated phase fractions reflect physical reality rather than instrumental artifacts.
XRD sample preparation guidelines for high-quality data
Obtaining high-quality diffraction data depends heavily on meticulous sample preparation to minimize preferred orientation and surface roughness effects.
The validity of XRD results relies on the assumption that the sample represents a random orientation of crystallites. In solid metal samples, rolling or extrusion processes create texture. This phenomenon occurs when grains align in specific directions. This preferred orientation enhances certain diffraction peaks while suppressing others. This often leads to erroneous quantitative results. Engineers mitigate this by using sample spinners or goniometer oscillation during data collection to interrogate a larger number of grains.
For powder samples, particle size reduction is crucial; ideal powders possess a particle size between 1 and 10 micrometers. Excessive grinding, however, can induce lattice strain or amorphization. In the analysis of bulk ceramics, surface roughness causes absorption variations and peak displacement. Polishing the surface flat ensures consistent sample height. This consistency is critical for maintaining the correct focusing geometry of the diffractometer. Failure to control sample displacement remains the largest source of error in peak position determination. For small quantities of high-value alloy powders or ceramic residues, the use of zero-background holders (typically cut from single-crystal silicon) prevents the sample holder itself from contributing amorphous scattering or spurious peaks to the pattern.
Advancements in XRD technology for material science applications
Advancements in detector technology and high-energy sources continue to expand the capabilities of diffraction analysis.
The evolution of XRD hardware moves toward higher speed and greater resolution. 1D and 2D solid-state detectors now allow for the collection of high-quality data in minutes rather than hours. This speed enables high-throughput screening of alloy compositions. These detectors also facilitate in-situ experiments, where researchers observe phase evolution in real-time during heating or mechanical testing. Synchrotron-based diffraction offers even higher energy and flux. It permits transmission geometry analysis through thick metallic components, revealing internal stress gradients impossible to measure with laboratory-scale instruments.
Automation in data analysis also plays a growing role. Artificial intelligence and machine learning algorithms are beginning to assist in phase identification. These tools rapidly match experimental patterns against massive databases. This reduces the burden on analysts and minimizes human bias in pattern interpretation. As materials science pushes towards compositionally complex high-entropy alloys and nanostructured ceramics, XRD remains the essential tool for linking atomic structure to macroscopic engineering properties.
This article was created with the assistance of Generative AI and has undergone editorial review before publishing.

