The pursuit of scientific advancement in materials science labs hinges on the reliability of data. Establishing and maintaining high-precision material characterization workflows is not just an aspiration but a fundamental requirement for groundbreaking research, quality control, and successful product development. When the properties of novel or existing substances are determined with absolute certainty, the downstream processes—from theoretical modeling to large-scale production—gain unparalleled confidence.
Optimizing sample preparation for high-precision material characterization
Achieving high-precision material characterization begins long before the sample enters the instrument, depending heavily on meticulous pre-analytical handling to ensure sample integrity.
The initial stages of any materials science lab workflow are the most vulnerable to introducing errors, which can severely compromise the reliability of the final result. Sample preparation must be treated as an analytical process in itself, with protocols rigorously documented and followed. Contamination, degradation, or alteration of the material's properties during preparation are common pitfalls that lead to irreproducible data. For example, milling processes might induce lattice strain, or solvent exposure might alter surface chemistry.
Protocols must clearly define acceptable limits for environmental exposure, including temperature, humidity, and atmospheric gas composition. For materials sensitive to oxidation or moisture, handling must occur within a controlled glovebox or under inert gas purging. Failure to maintain these controls introduces variables that complicate the interpretation of spectroscopic and thermal data.
Key contamination risks that must be mitigated in lab operations include:
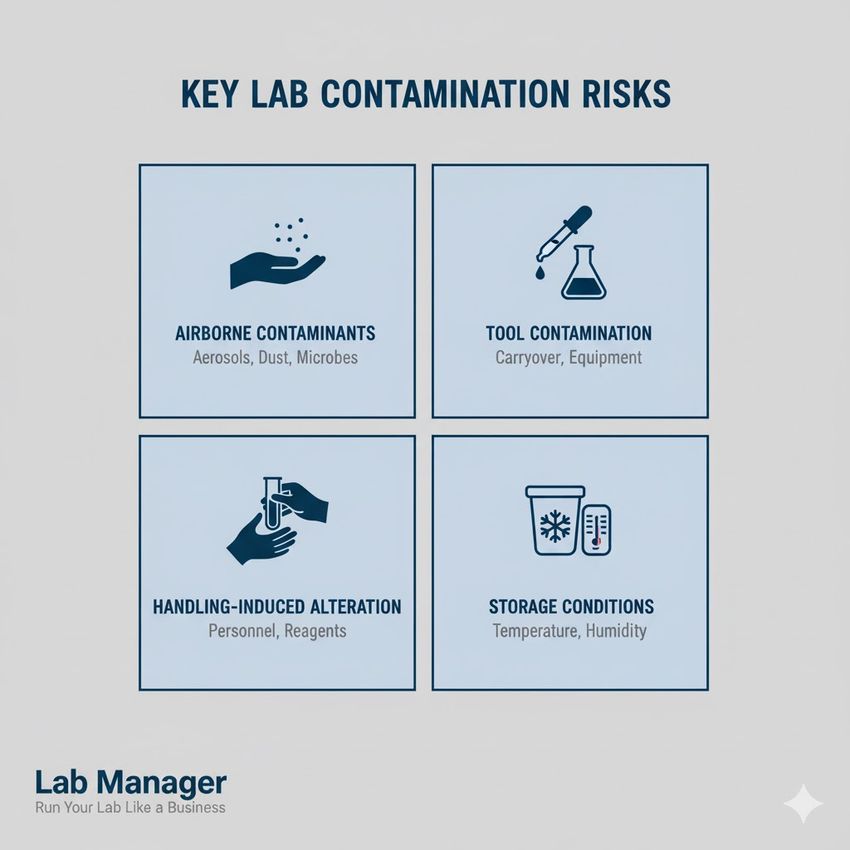
Precision starts with prevention. Identify and mitigate these 4 core contamination risks.
GEMINI (2025)
- Airborne Contaminants: Managing dust, aerosols, and moisture, especially for sensitive surface analysis techniques like X-ray Photoelectron Spectroscopy (XPS) or Scanning Electron Microscopy (SEM).
- Tool Contamination: Dedicated, single-use, or rigorously cleaned tools are essential to prevent cross-contamination from previous samples. Cleaning procedures must be validated to ensure residues from prior characterizations are below the limits of detection for the current analysis.
- Handling-Induced Alteration: Minimizing thermal, mechanical, or chemical stress during cutting, polishing, or mounting procedures. Introducing heat during sectioning, for instance, can change the amorphous content or cause phase transitions in certain polymers or metallic alloys.
- Storage Conditions: Implementing inert atmosphere (argon/nitrogen) or strict temperature and humidity controls for reactive or volatile materials. The duration and conditions of storage must also be documented to establish a clear audit trail.
The principles of good laboratory practice (GLP) demand meticulous documentation of sample preparation methods, including all reagents, solvents, tools, and environmental conditions, to ensure results are repeatable and defensible (OECD (1998). Principles of Good Laboratory Practice (GLP). This level of detail in the pre-analytical phase is paramount to ensuring true high-precision material characterization.
Selecting and validating instrumentation for high-precision characterization
Selecting the appropriate analytical technique and rigorously validating its performance are foundational steps for reliable high-precision material characterization.
The sheer diversity of materials and properties necessitates a careful matching of the material challenge to the analytical solution. A workflow designed for determining crystallographic structure (e.g., X-ray Diffraction, XRD) differs drastically from one focused on elemental composition (e.g., Inductively Coupled Plasma Mass Spectrometry, ICP-MS). Materials science labs must invest not only in state-of-the-art equipment but also in the meticulous, scheduled calibration and operational qualification (OQ) of that instrumentation.
Instrument validation should cover linearity, range, sensitivity, and robustness. For any established workflow, the use of Certified Reference Materials (CRMs) is non-negotiable for proving analytical accuracy and maintaining the standards required for high-precision material characterization. CRMs provide a known, traceable benchmark against which instrument performance can be consistently checked.
Critical validation parameters for establishing a high-precision material characterization method:
Parameter | Description for High-Precision | Purpose in Lab Operations |
|---|---|---|
Resolution | Ability to distinguish between closely related signals (e.g., isotopes, bond states, close lattice planes). | Ensures discrete features are accurately separated, minimizing peak overlap and measurement ambiguity. |
Detection Limit | Lowest concentration or amount reliably detectable above background noise. | Essential for trace analysis and qualifying purity standards of raw materials and finished products. |
Accuracy | Closeness of a measurement to the true value, established using CRMs or inter-laboratory comparison. | Confirms the instrument is providing results without significant systematic bias across its operational range. |
Precision | Closeness of agreement among multiple measurements, reported as standard deviation or relative standard deviation. | Demonstrates the method’s consistency and reproducibility over time and across different analysts. |
Robustness | Insensitivity of the measurement to small, deliberate variations in method parameters (e.g., flow rate, temperature). | Guarantees the method remains reliable under normal variations encountered in routine lab operations. |
When commissioning new equipment, establishing a comprehensive acceptance testing protocol that challenges the instrument's specified performance across its operating range is key. This initial qualification sets the baseline for all subsequent high-precision material characterization data generated.
Ensuring data integrity and measurement uncertainty in materials science labs
Effective management and statistical analysis of raw data are crucial post-analytical steps that transform instrument outputs into defensible high-precision material characterization results.
The volume and complexity of data generated in modern materials science labs demand robust data management systems. Raw instrument data must be captured automatically, time-stamped, and protected from modification to ensure data integrity and traceability, a core component of good lab operations. Furthermore, the application of appropriate statistical methods is essential to derive meaningful insights and quantify the uncertainty inherent in any measurement.
The measurement of uncertainty (MU) is particularly critical for asserting the quality of high-precision material characterization. MU is not simply the standard deviation; it represents a parameter associated with the result of a measurement that characterizes the dispersion of the values that could reasonably be attributed to the measurand. This involves identifying and calculating contributions from all potential sources of variation: instrument calibration, environmental factors, sample preparation, and operator variability. Professionals must report results with an expanded uncertainty, which is calculated using a coverage factor to provide a specified level of confidence (typically 95%).
Key elements of post-analytical data rigor:
- Traceability Chain: All final data must be traceable back to the raw instrument file, the specific instrument used, and the detailed preparation log of the sample. This requires integration between instrument software and a central data repository, such as a Laboratory Information Management System (LIMS).
- Statistical Outlier Management: Employing validated statistical tests (e.g., Grubbs' test or Dixon's Q test) to identify and appropriately treat potential outlier data points, ensuring transparency in reporting. Outliers should be investigated for root causes (e.g., sample contamination, instrument malfunction) rather than simply excluded.
- Digital Preservation and Security: Implementing secure, validated electronic data capture (EDC) systems, often managed through a LIMS, to meet compliance requirements for data security and auditing.
Guidelines established by organizations like the International Organization for Standardization (ISO), specifically ISO/IEC 17025, provide the framework for competent testing and calibration, placing heavy emphasis on metrological traceability and measurement uncertainty, which is foundational to high-precision material characterization.
Building a sustained quality assurance program for materials lab operations
Sustaining high-precision material characterization requires a commitment to a comprehensive quality assurance (QA) program and continuous regulatory preparedness within lab operations.
A successful quality system extends beyond initial method validation to encompass regular audits, proficiency testing, and ongoing personnel training. Regular internal and external audits help identify deviations from standard operating procedures (SOPs) before they compromise data quality. Internal audits should focus on compliance with established SOPs and instrument maintenance schedules, while external audits provide an objective assessment of the overall quality system. Proficiency testing, where a lab analyzes blind samples and compares results against peers, provides an external measure of competence in materials science labs.
Crucially,SOPs must be living documents, updated immediately whenever instrumentation, reagents, or regulatory guidelines change. A process for version control and mandated review cycles ensures that every analyst is operating under the current, verified methodology. Training programs must be formalized, with competency assessments performed regularly to ensure all personnel involved in the high-precision material characterization workflow are operating at the required standard. This involves practical demonstrations of proficiency, not just theoretical review.
Compliance with regulatory standards is non-negotiable, particularly in industries where data supports product safety or efficacy. The U.S. Food and Drug Administration (FDA) guidelines, such as 21 CFR Part 11 concerning electronic records and electronic signatures, set stringent requirements for data integrity and security, which are directly applicable to electronic data generated during high-precision material characterization for regulated industries. Adherence to these standards is key to maintaining the high level of trust required for characterization results. This proactive, cyclical approach to quality minimizes risk and ensures that all high-precision material characterization data is trustworthy and legally defensible.
Advancing materials science through high-precision characterization workflows
Achieving and maintaining high-precision material characterization is an ongoing, systematic commitment, not a one-time process. By implementing robust, documented workflows that prioritize sample integrity, validate instrument performance, apply rigorous statistical analysis, and uphold strict quality assurance standards, materials science labs ensure their characterization data is reliable and repeatable. This meticulous approach to lab operations not only meets regulatory demands but fundamentally drives the certainty required for successful scientific and commercial outcomes. Investing in a structured workflow is the essential foundation for innovation in materials science.
Frequently Asked Questions (FAQ)
What is the typical keyword density for SEO optimization in technical articles?
The recommended keyword abundance for SEO is typically between 0.5% and 3.0%, ensuring the keywords, such as high-precision material characterization, are incorporated naturally without compromising readability or technical accuracy.
How do materials science labs ensure data traceability for high-precision characterization?
Data traceability is achieved by linking the final reportable result back to the original raw data file, the specific instrument used, the operator, and a detailed, time-stamped log of the sample preparation, often managed through a Laboratory Information Management System (LIMS).
Why is measurement uncertainty critical for high-precision material characterization?
Measurement uncertainty quantifies the potential range of values attributable to the measured property. Reporting results with expanded uncertainty is essential for transparently communicating the level of confidence in the high-precision material characterization result, as mandated by international standards like ISO/IEC 17025.
What role does sample preparation play in high-precision material characterization workflows?
Sample preparation constitutes the critical pre-analytical phase. Errors introduced here, such as contamination or mechanical alteration, directly compromise the integrity of the material's properties, rendering the subsequent high-precision material characterization data unreliable and non-reproducible.
This article was created with the assistance of Generative AI and has undergone editorial review before publishing.


